Install AskDolphin
Install AskDolphin on Shopify
This guide provides easy-to-follow steps to install and activate the AskDolphin widget, helping you communicate effectively with your website visitors.
In this article, you’ll learn:
How to install AskDolphin via Plugin (Shopify App Store).
How to activate the AskDolphin widget on your website.
How to install AskDolphin for existing accounts (Advanced JavaScript installation).
Let’s get started and make your setup process as simple as possible!
Note: The AskDolphin widget can be installed on your website using only one method, either the plugin or the JavaScript code.
Install AskDolphin via Shopify Plugin
The easiest way to add AskDolphin to your Shopify store is through our official plugin, available in the Shopify App Store.
To get started, log in to your Shopify account and select the store where you want to install AskDolphin. Then, navigate to the Apps tab and type AskDolphin in the search bar to find the plugin.
Select AskDolphin: Live Chat & AI and click on the Install (Add app) button to add AskDolphin to your Shopify store.
On the following page, select the Install App button. This action will redirect you to your AskDolphin panel, where you can customize your chat widget.
You will be asked for your email, password, and other relevant details about your business and brand (see how to create an AskDolphin account). If you encounter a warning indicating that your email is already in use, please reach out to our support team for assistance.
Once setup is complete, enable the AskDolphin Chat Widget in your theme’s App embeds (steps below) to make it visible on your store. Your customers can now engage with you directly through chat.
Activate AskDolphin App in Shopify
After installing the AskDolphin App, follow these steps to make the chat widget visible to visitors on your website.
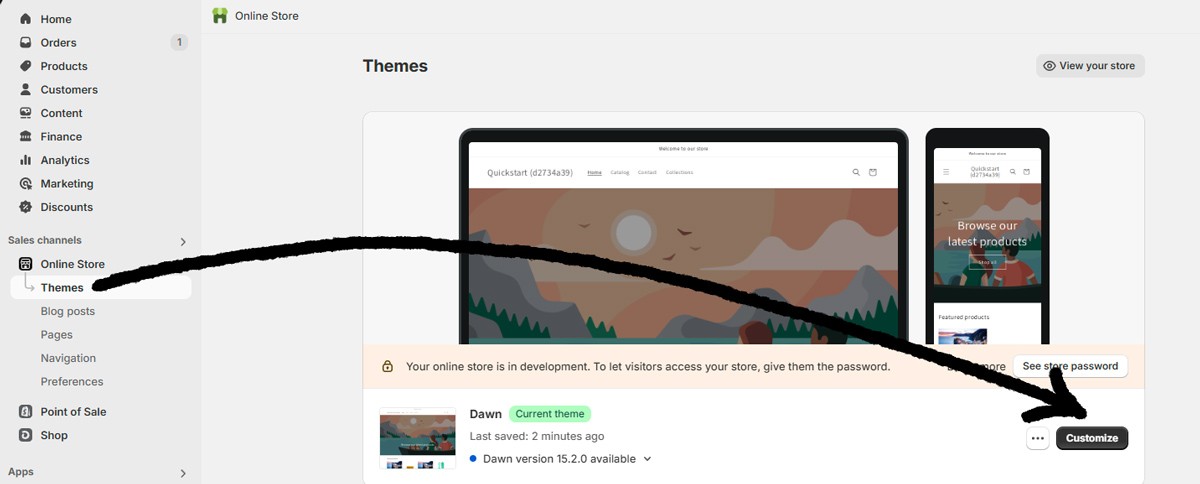
Step 1: Open Your Shopify Admin Panel
Log in to your Shopify admin panel and navigate to Online Store > Themes. Select the theme you want to edit and click Customize (Edit theme).
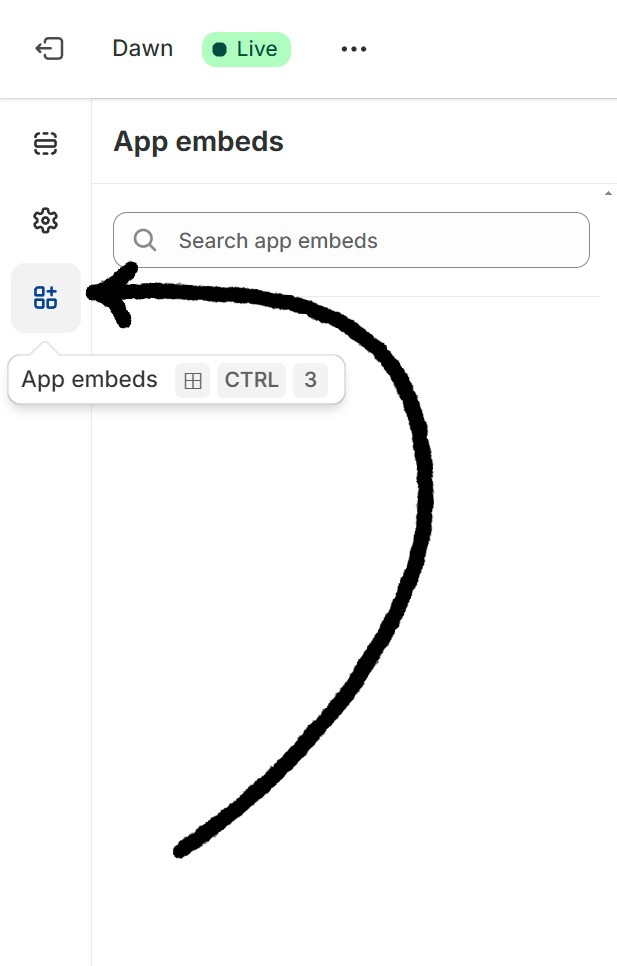
Step 2: Access the App Embeds Tab
Within the customization panel, open the App embeds tab.
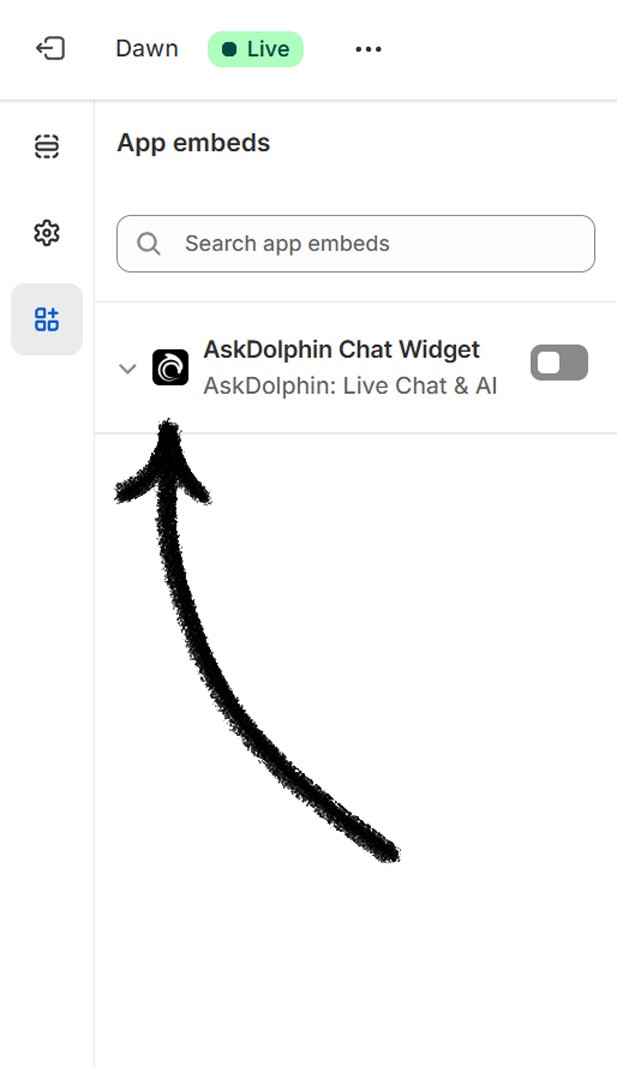
Step 3: Find the AskDolphin Widget
In the App embeds section, find AskDolphin Chat Widget in the list of apps.
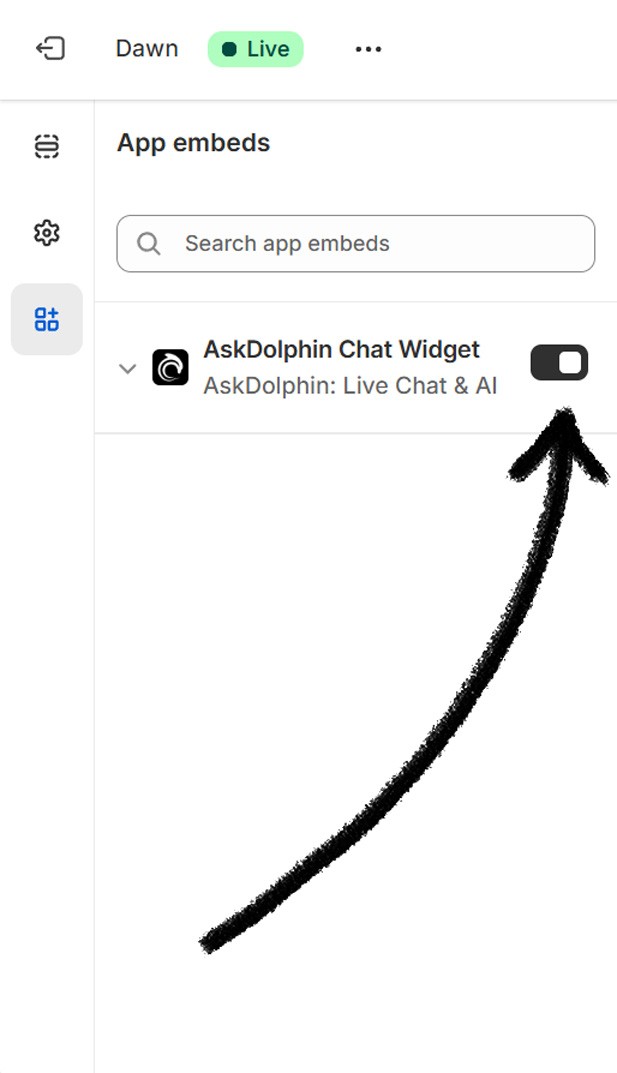
Step 4: Enable the AskDolphin Chat Widget
Toggle the AskDolphin Chat Widget to the on position. Once enabled, click Save to apply the changes.
Note: You will need to repeat this activation process if you switch to a new theme in your Shopify store.
After saving your changes, open your Shopify store and refresh the page to make sure the AskDolphin chat widget is visible and working correctly.

Alternative - Install AskDolphin via JavaScript code
If you have an existing AskDolphin account or prefer not to use the Shopify plugin, this method is for you. With this approach, you can manually add the AskDolphin chat widget to your Shopify store.
Please note that Shopify-specific features and flows will still function correctly, but billing will remain managed through AskDolphin.
Steps to Add AskDolphin via JavaScript Code:
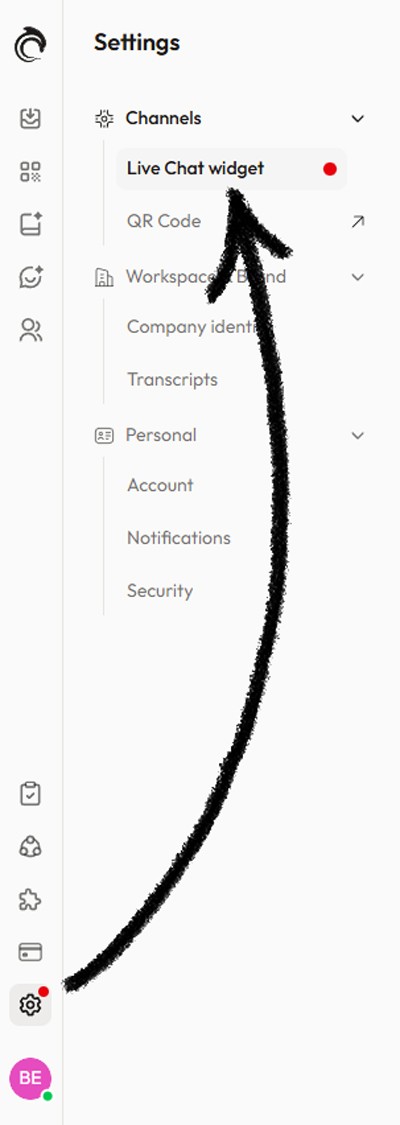
Step 1: Open Live Chat widget settings
Log in to your AskDolphin panel and go to Settings > Channels > Live Chat widget.
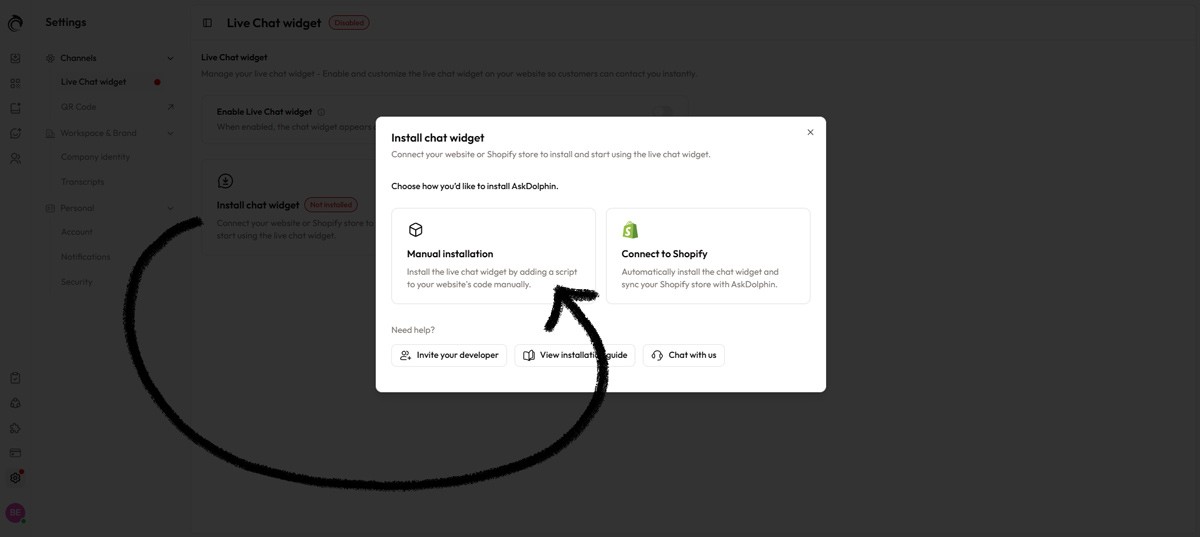
Step 2: Open the Manual installation option
Click Install chat widget, then select Manual installation.
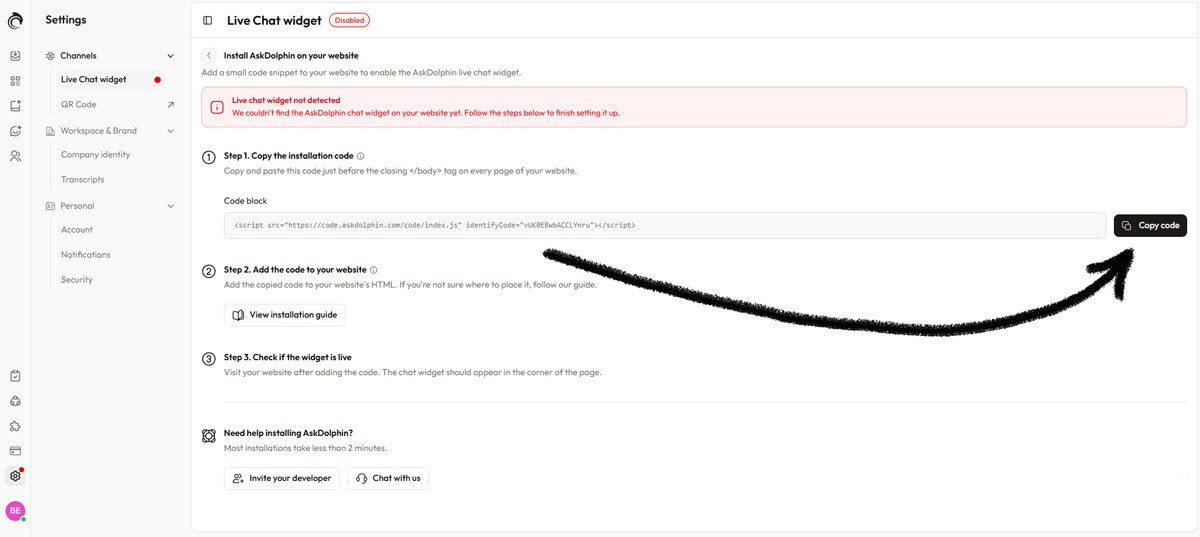
Step 3: Copy the installation code
Copy the code shown in the Code block.
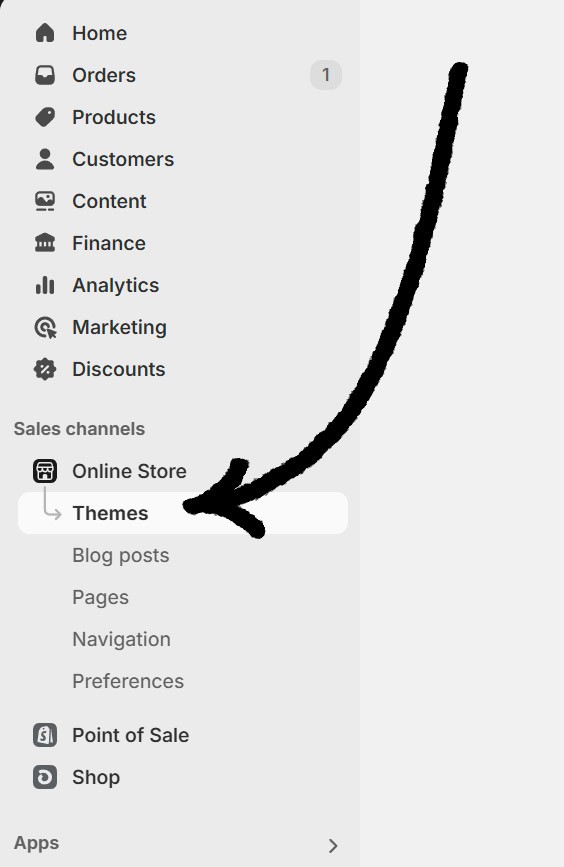
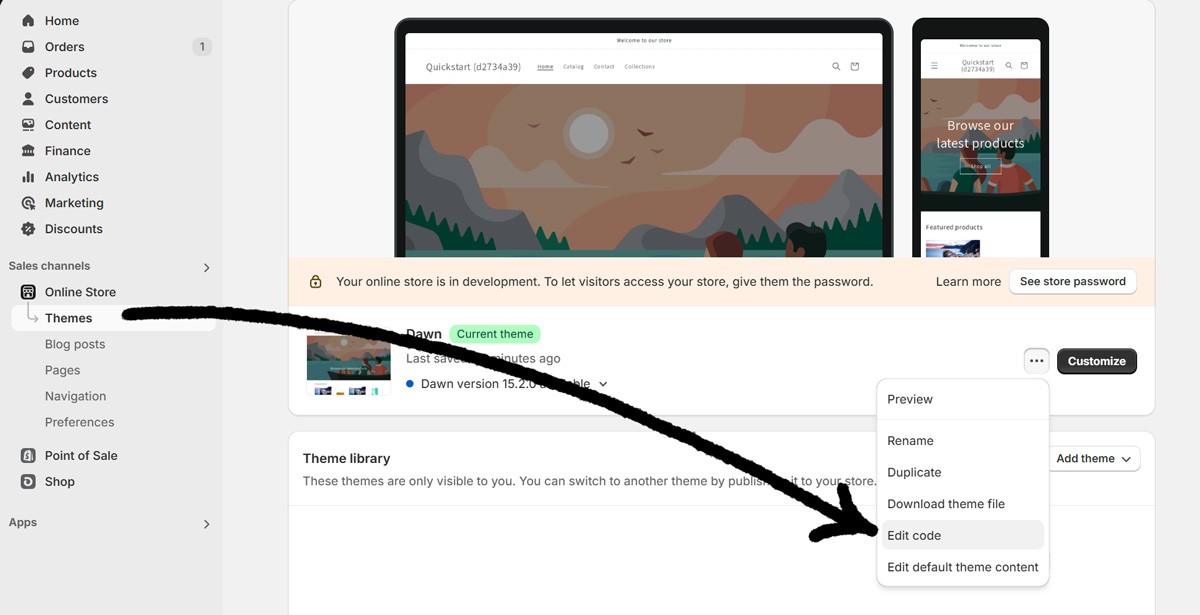
Step 4: Access Your Shopify Panel
Open your Shopify admin panel. Under Online Store, go to the Themes section.
Locate your active theme and click on the three dots next to the Customize button. From the dropdown menu, select Edit Code.
Step 5: Add the JavaScript Code to the Theme
In the code editor that opens, navigate to the Layout > theme.liquid file.
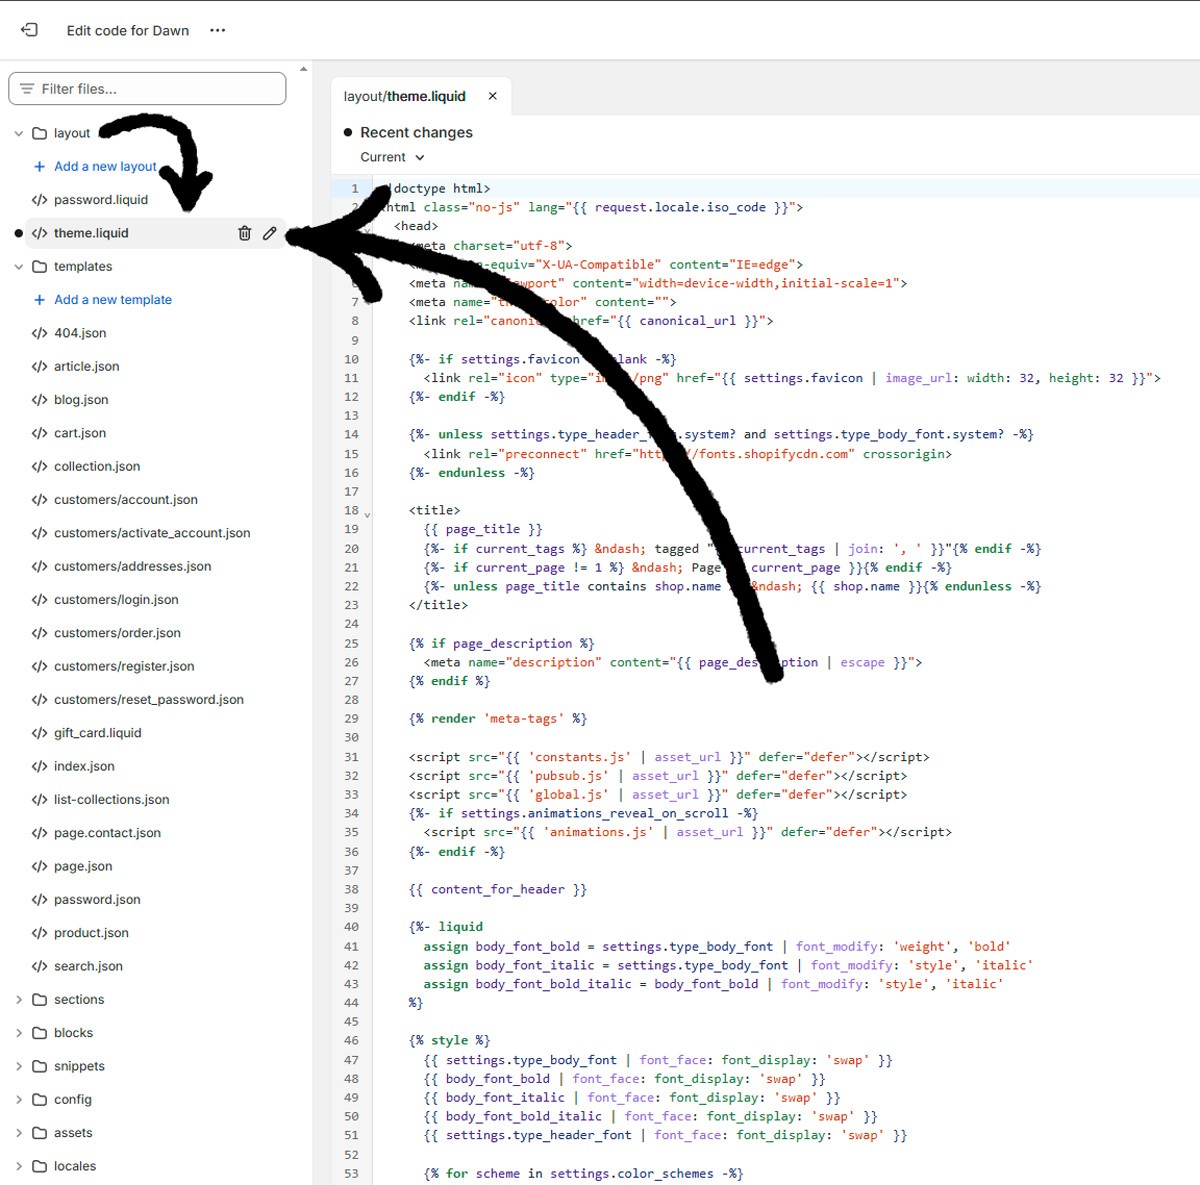
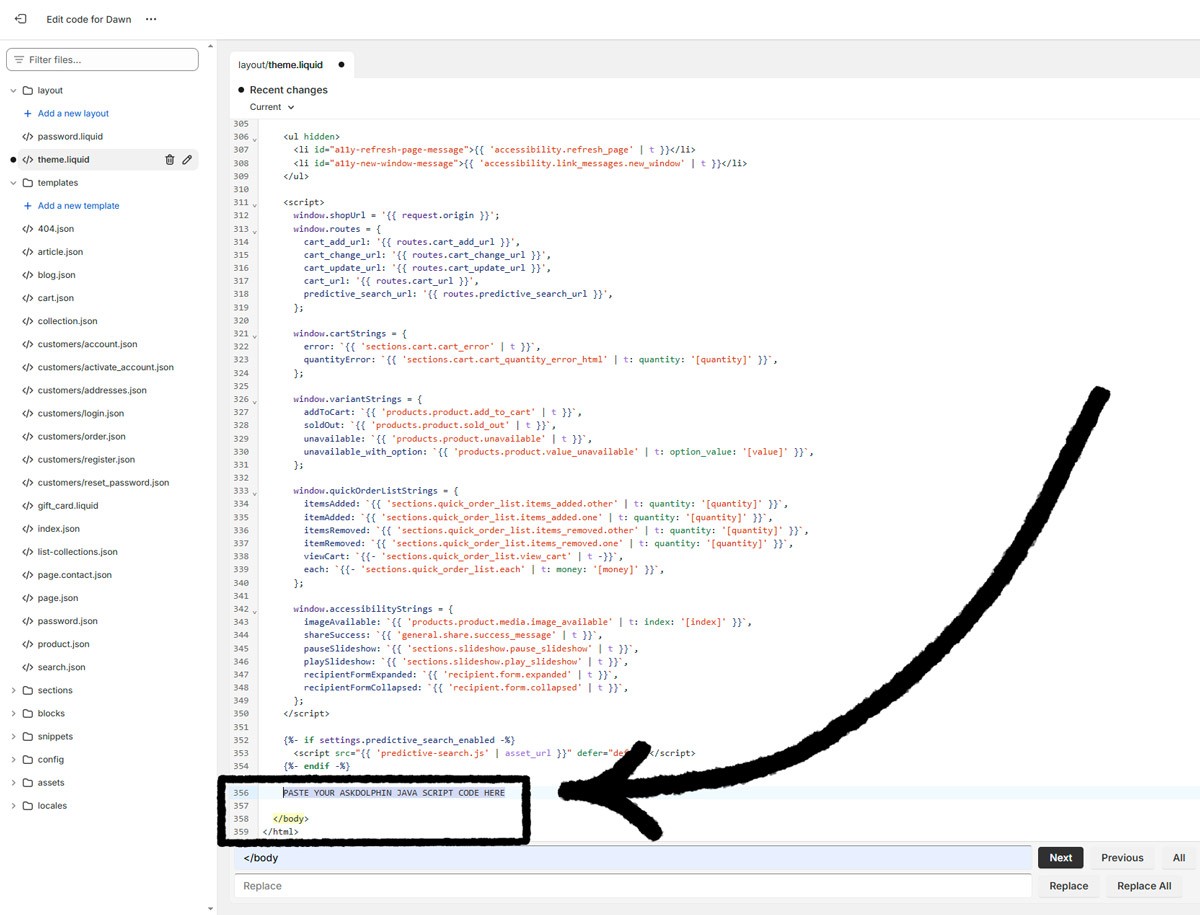
Tip: To make finding the correct spot easier, press CTRL+F (or CMD+F on Mac) and search for </body> in the code editor.
Scroll to the bottom of the file and paste the JavaScript code right before the closing </body> tag.
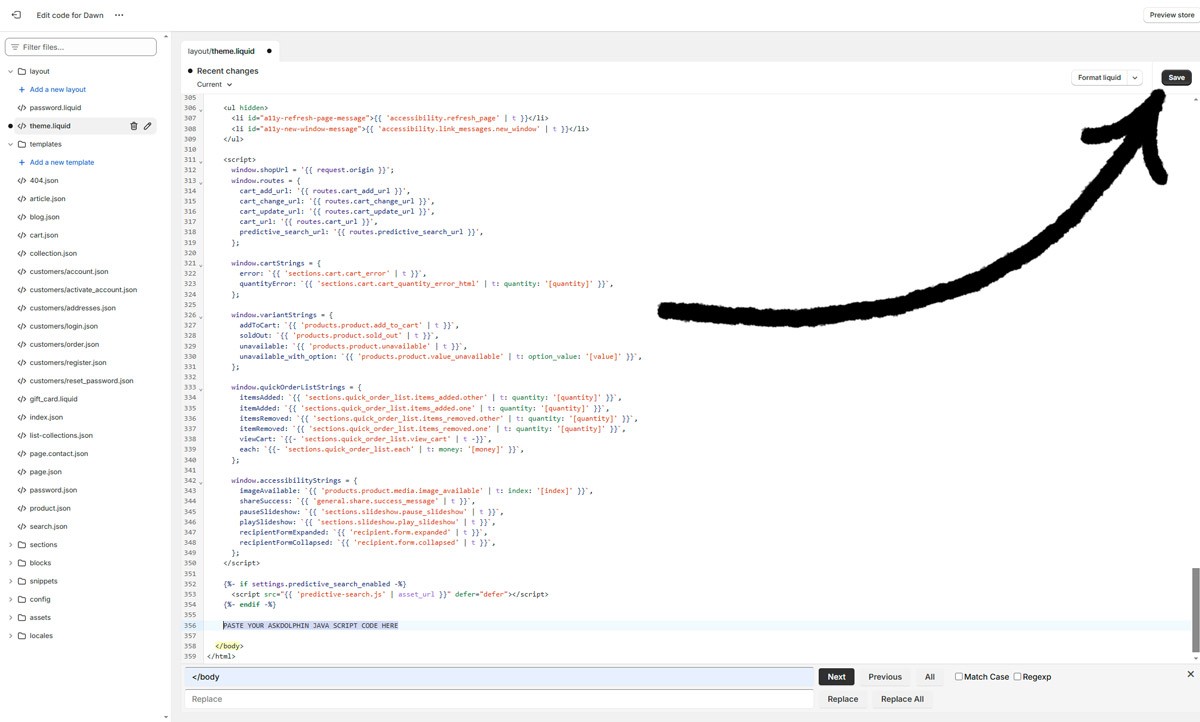
Step 6: Save and Refresh Your Website
After pasting the code, click Save.
Once your updates are saved, visit your Shopify site and reload the page to check that the AskDolphin widget has been successfully installed and is responding as expected.
Any other questions? Get in touch