Install AskDolphin
Install AskDolphin on your Website
In this article, you’ll learn:
How to install AskDolphin using the plugin installation
How to install AskDolphin using the JavaScript code installation
Let’s get started and make your setup process as simple as possible!
AskDolphin Plugin Installation
For the easiest and most convenient way to install AskDolphin, search for the AskDolphin plugin in your platform's app store. For example, you can install AskDolphin from the Shopify App Store. Follow the simple step-by-step guide to get started quickly.
If your platform doesn’t support plugins, don’t worry! You can still integrate AskDolphin by using the JavaScript code installation method. This manual install works for most websites and platforms, including WordPress, Webflow, Wix, Squarespace, custom HTML sites, and many other CMS tools (and it can also be used on Shopify if you prefer installing by code).
JavaScript Code Installation
To install AskDolphin using the JavaScript code method on your website, you’ll first need to create an AskDolphin account. To get started, visit our website at askdolphin.com and click the Get Started button to sign up for a new account. If you already have an account, simply click the Sign In button to proceed.
The installation process is simple and requires just one line of JavaScript code to be pasted into the correct section of your website's code.
To install AskDolphin using the JavaScript method:
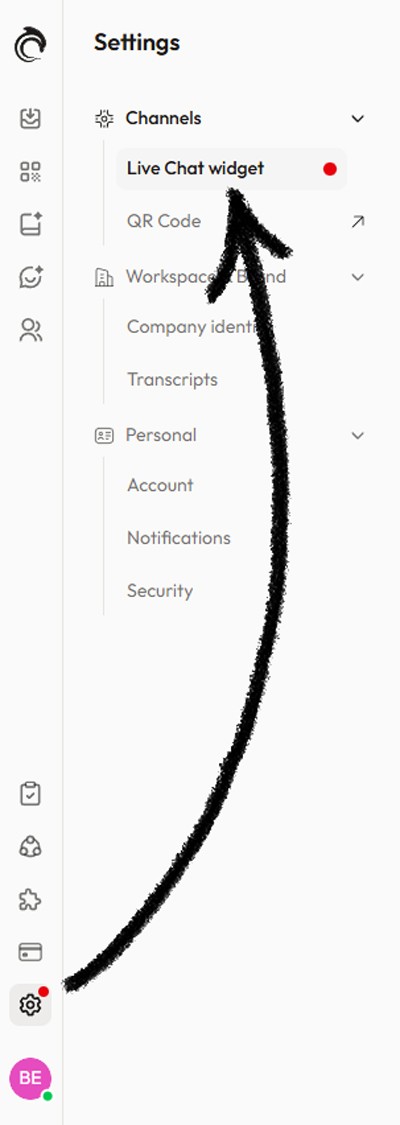
1. Locate Your Installation Code
To find your unique AskDolphin JavaScript code, go to:
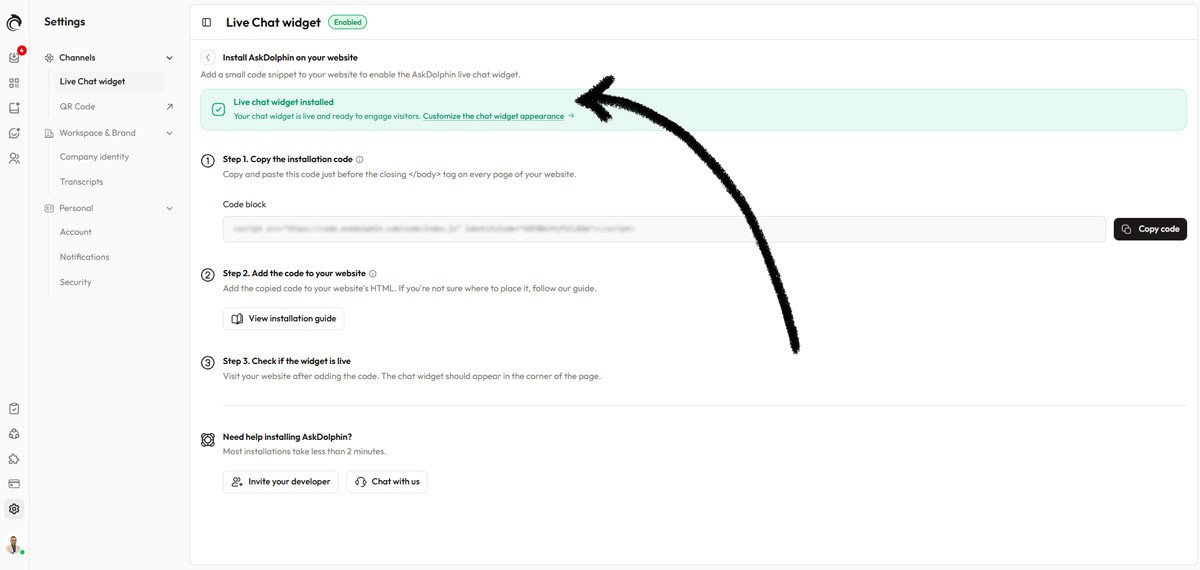
Settings > Channels > Live Chat widget in your AskDolphin panel.
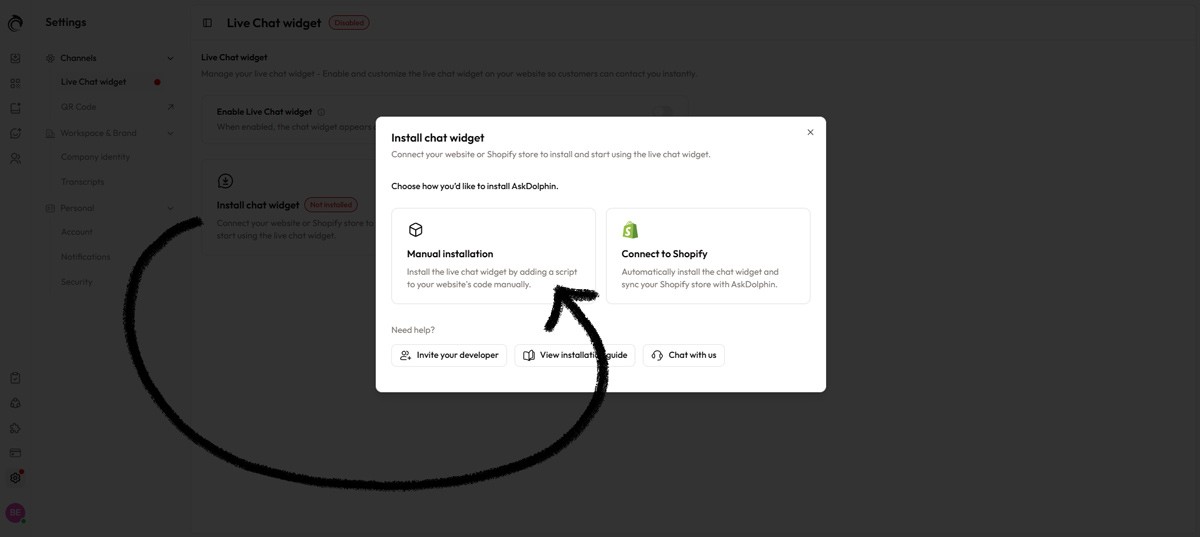
Click Install chat widget, then choose Manual installation.
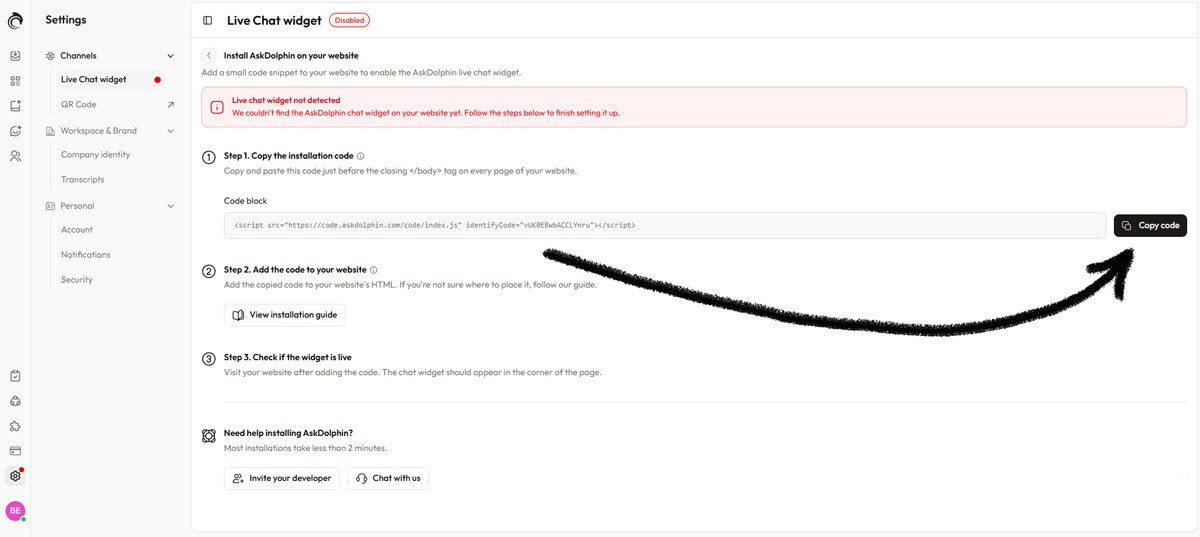
You’ll see your AskDolphin installation code in the Code block.
2. Copy the JavaScript Code
Click the Copy code button to copy the JavaScript code.
3. Access Your Website's Backend
Log in to your website's backend using the tool or dashboard that allows you to edit your site files. Alternatively, access the server where your website is hosted.
4. Locate the File with the </body> Tag
Search for the HTML or PHP file containing the </body> tag. Usually, this will be a file like index.html or index.php.
If your website is built on a CMS or page builder, you may need to access a specific code editor section to add custom scripts.
Note: If you’re unsure where to find this file, consult your web designer or platform support team.
5. Paste the JavaScript Code Above the </body> Tag
Locate the closing </body> tag in your file. Use the search function or scroll to the bottom of the file.
Paste the JavaScript code snippet above the closing </body> tag.

6. Save Your Changes
Save the changes to your website file.
7. Verify the Installation (Check it’s working)
After saving the changes, go back to Settings > Channels > Live Chat widget in your AskDolphin panel to confirm the widget is active. If installed successfully, you’ll see a Live chat widget installed confirmation. Then visit your website and make sure the chat widget appears.
Once confirmed, visit your website to ensure the AskDolphin chat widget is visible and ready to engage with your visitors.

You’ve successfully installed AskDolphin Chat on your website!
Any other questions? Get in touch