Install AskDolphin
Install AskDolphin on Framer
This guide provides easy-to-follow steps to install and activate the AskDolphin widget on your Framer website.
In this article, you’ll learn:
How to install AskDolphin on Framer from your AskDolphin panel
How to install AskDolphin on Framer if you start from the Framer Marketplace
How to publish your Framer project and verify the widget
How to temporarily disable the widget
How to remove the AskDolphin widget from Framer
Let’s get started and make your setup process as simple as possible!
Note: For Framer websites, we recommend using the Connect to Framer installation flow. If you have already installed AskDolphin manually using JavaScript code, you do not need to install it again through the Framer plugin.
Install AskDolphin on Framer from your AskDolphin panel
The easiest way to add AskDolphin to your Framer website is through your AskDolphin panel using the Framer installation flow.
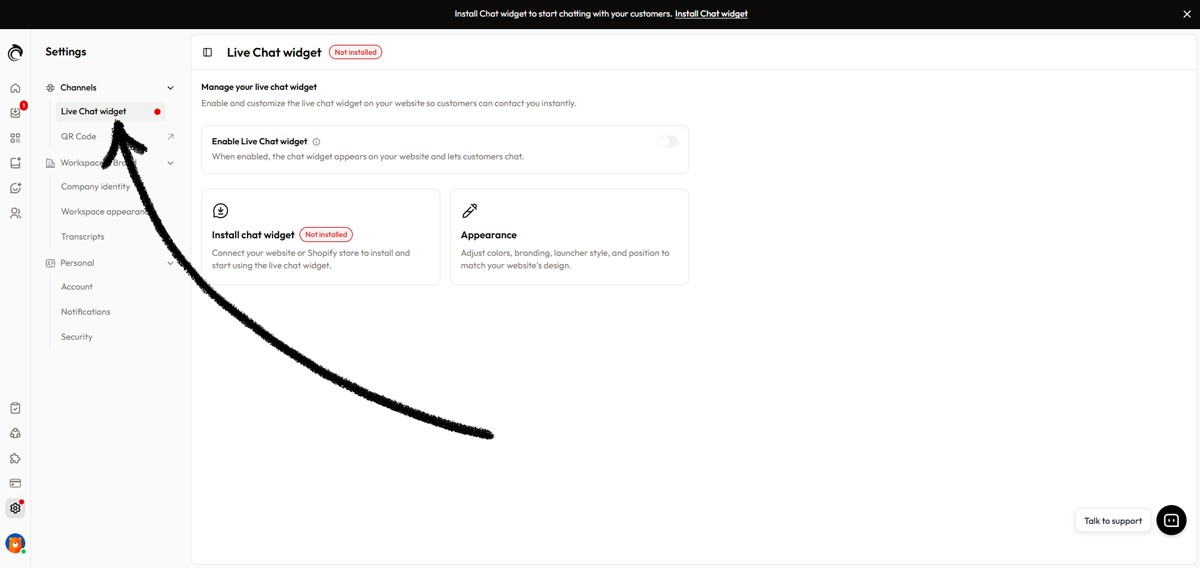
Step 1: Open Live Chat widget settings
Log in to your AskDolphin panel and go to:
Settings > Channels > Live Chat widget
Step 2: Open the Framer installation option
Click the Install chat widget card.
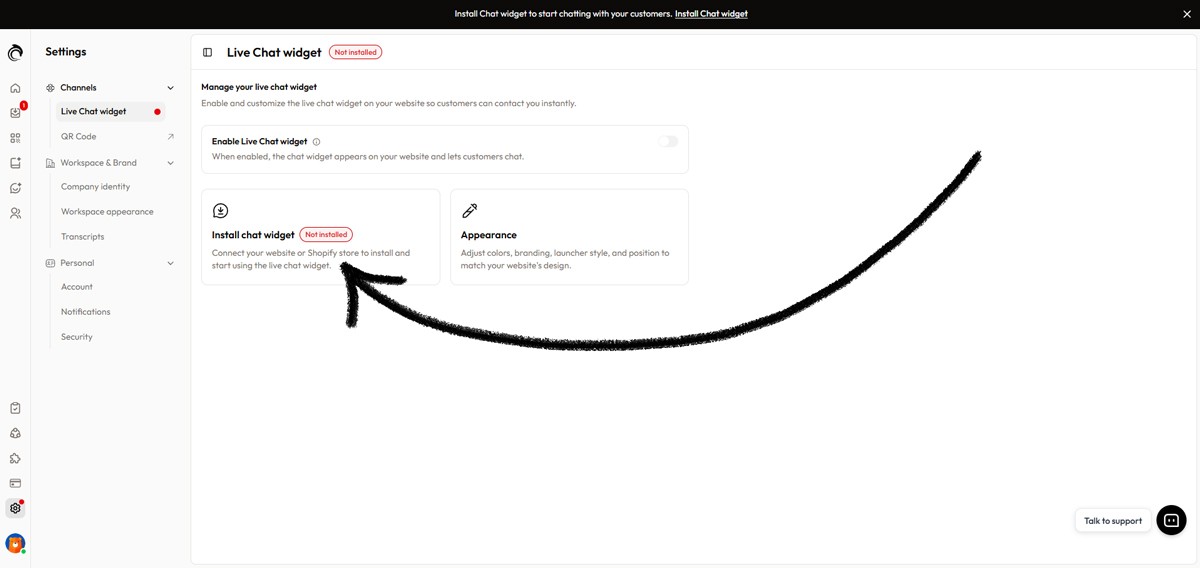
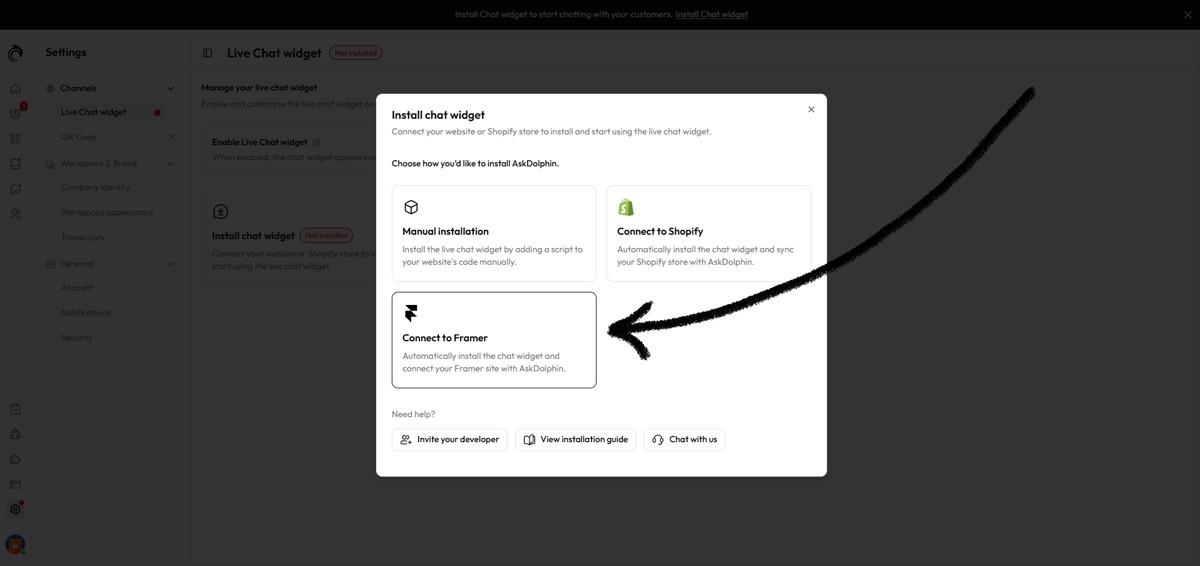
A modal window will open and show the available installation methods. Select Connect to Framer to continue.
This will open the Framer installation page inside your AskDolphin panel.
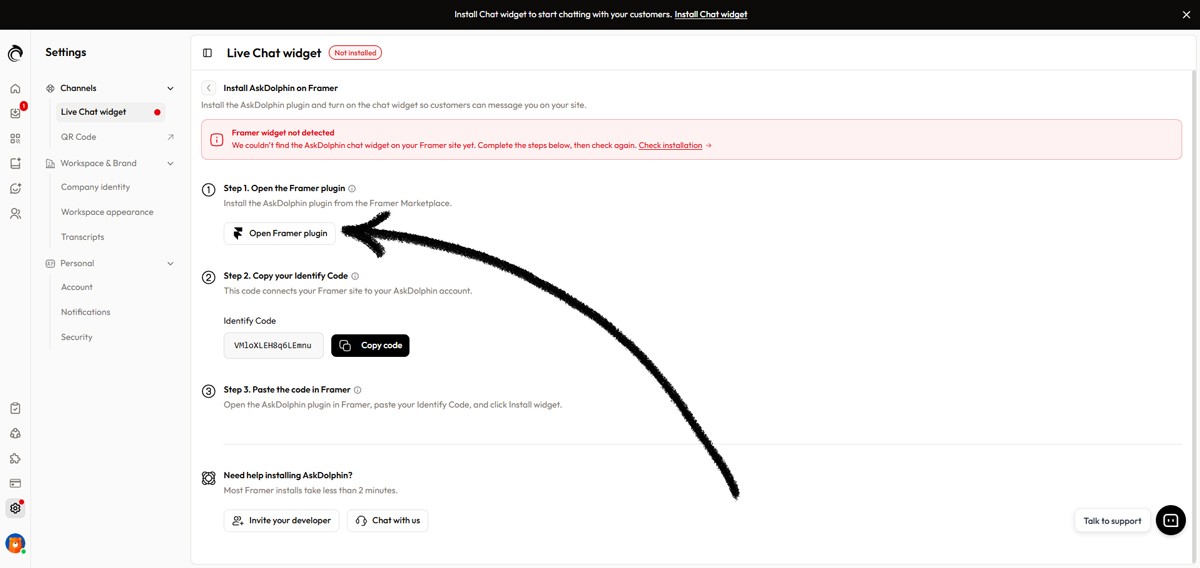
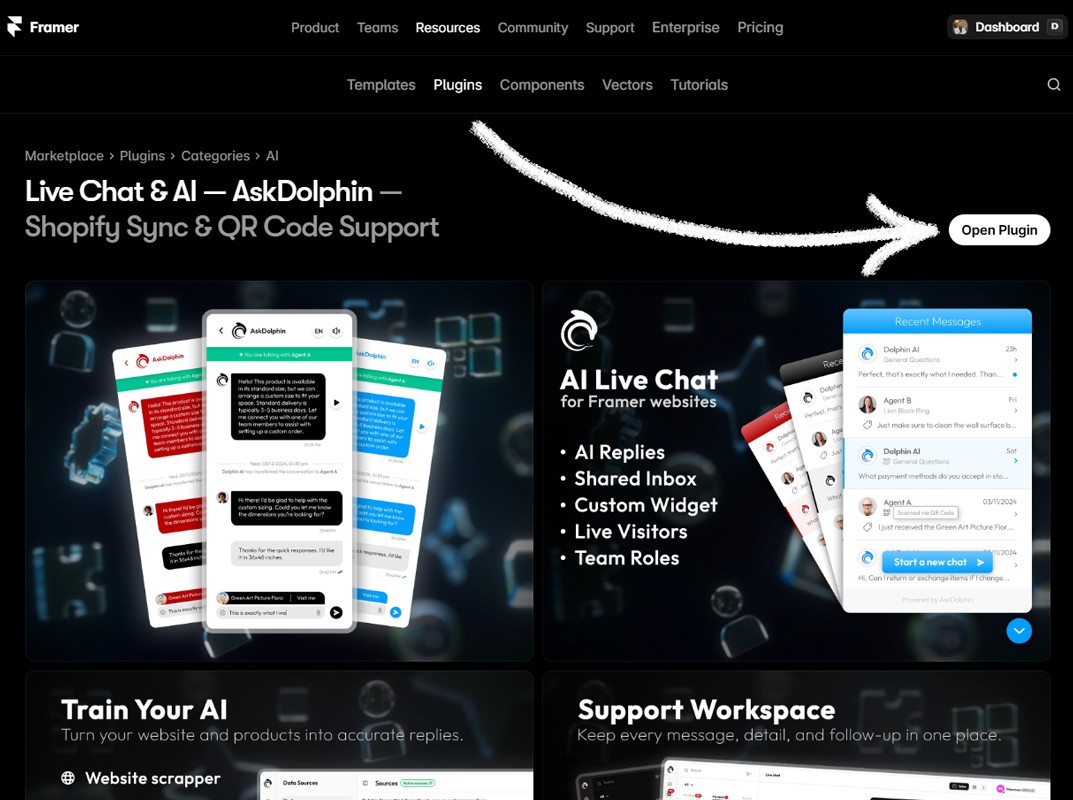
Step 3: Open the AskDolphin Framer plugin
On the Framer installation page, click Open Framer plugin.
This will open the AskDolphin plugin page in Framer Marketplace in a new tab.
On the Framer Marketplace page, click Open Plugin and choose the Framer project where you want to install AskDolphin.
Once your project opens in Framer, the AskDolphin plugin window will appear inside your workspace. If the widget has not been connected yet, you will see the status Widget Not Added.
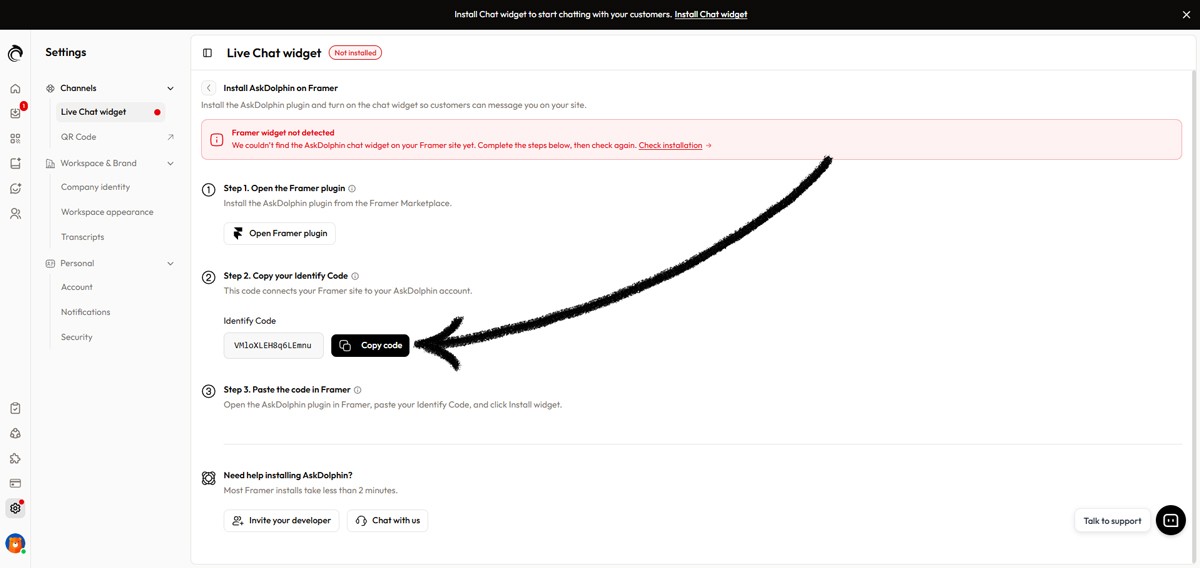
Step 4: Copy your Identify Code
Go back to your AskDolphin panel and stay on the Framer installation page.
Under Step 2. Copy your Identify Code. Copy your unique 16-character Identify Code. This code connects your Framer project to your AskDolphin account.
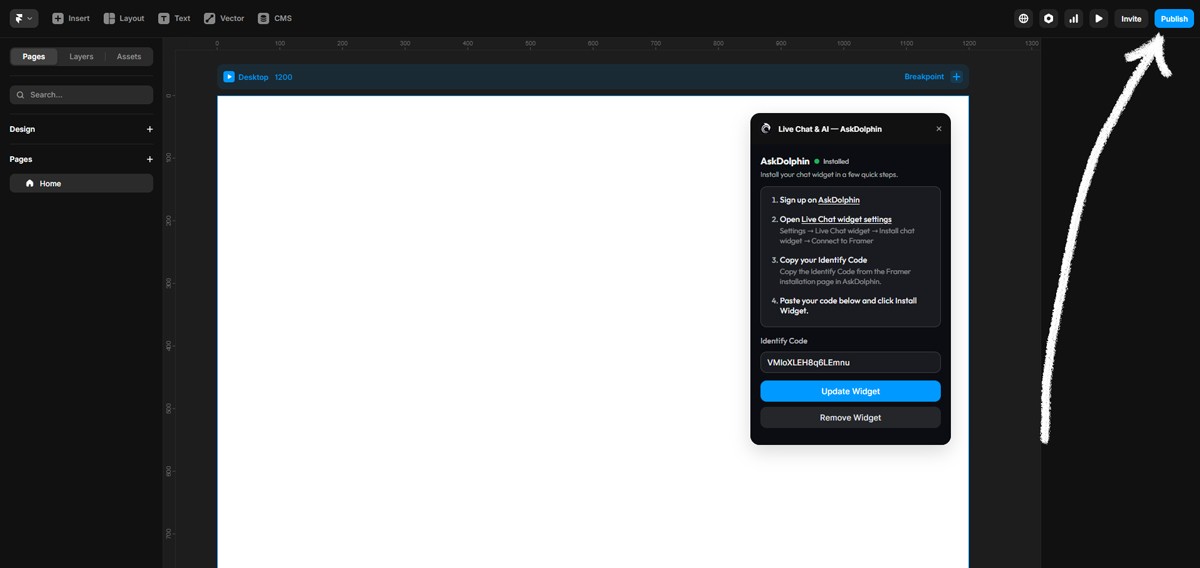
Step 5: Paste the code into Framer and install the widget
Return to your Framer project.
In the AskDolphin plugin window, find the Identify Code field and paste your 16-character code into it.
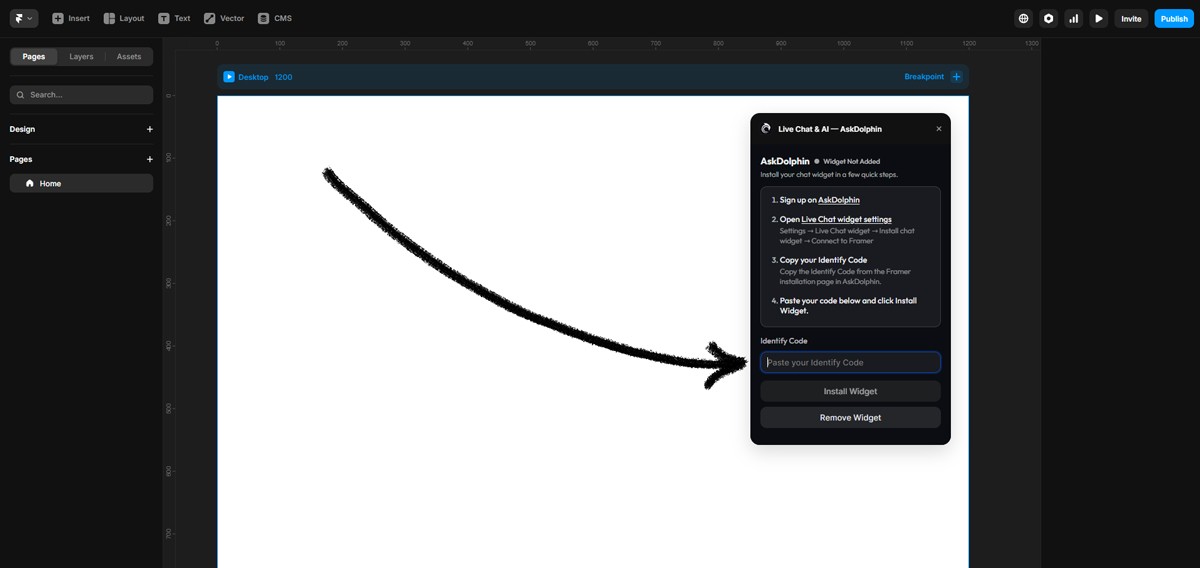
Then click Install Widget.

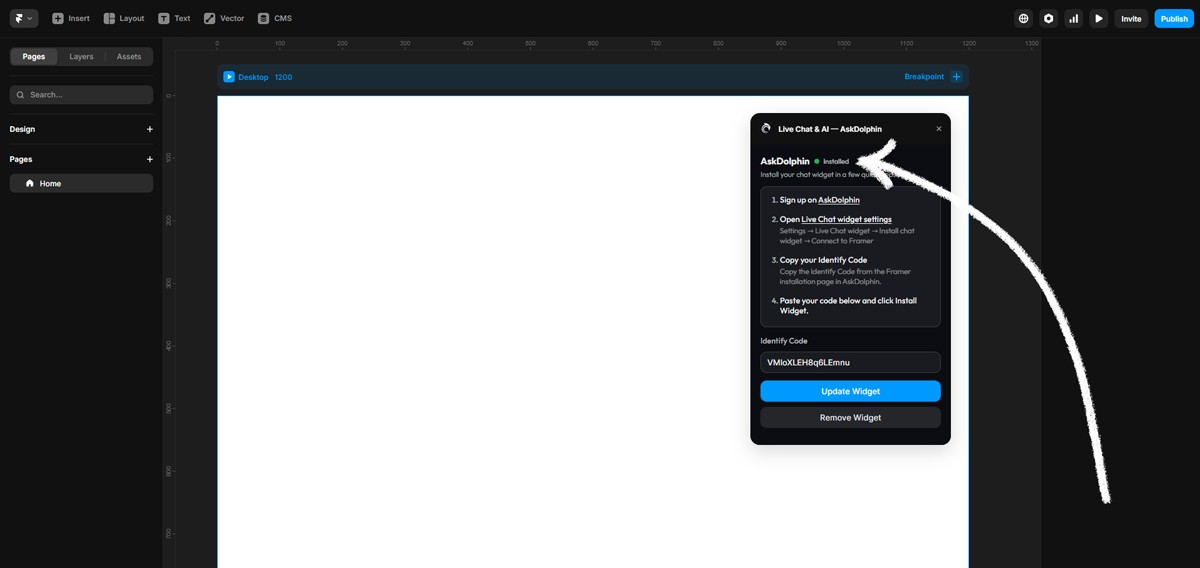
After a few moments, the plugin status will update from Widget Not Added to Installed with a green status indicator.
Step 6: Publish your Framer project
After the widget is installed, click the blue Publish button in the top-right corner of your Framer project.
This step is required. Even if the plugin shows Installed, the AskDolphin chat widget will not appear on your live website until you publish the project.
After publishing, go back to your AskDolphin panel and return to the Framer installation page. If the installation was successful, your live chat widget status will show as installed.

You’ve successfully installed AskDolphin on Framer.
Install AskDolphin on Framer from Framer Marketplace
Some users will find AskDolphin directly from the Framer Marketplace first. If that is how you started, you can still complete the setup in just a few steps.
Step 1: Open the plugin in Framer
Go to the AskDolphin page in Framer Marketplace and click Open Plugin.
Choose the Framer project where you want to use AskDolphin. The plugin window will open inside your project.
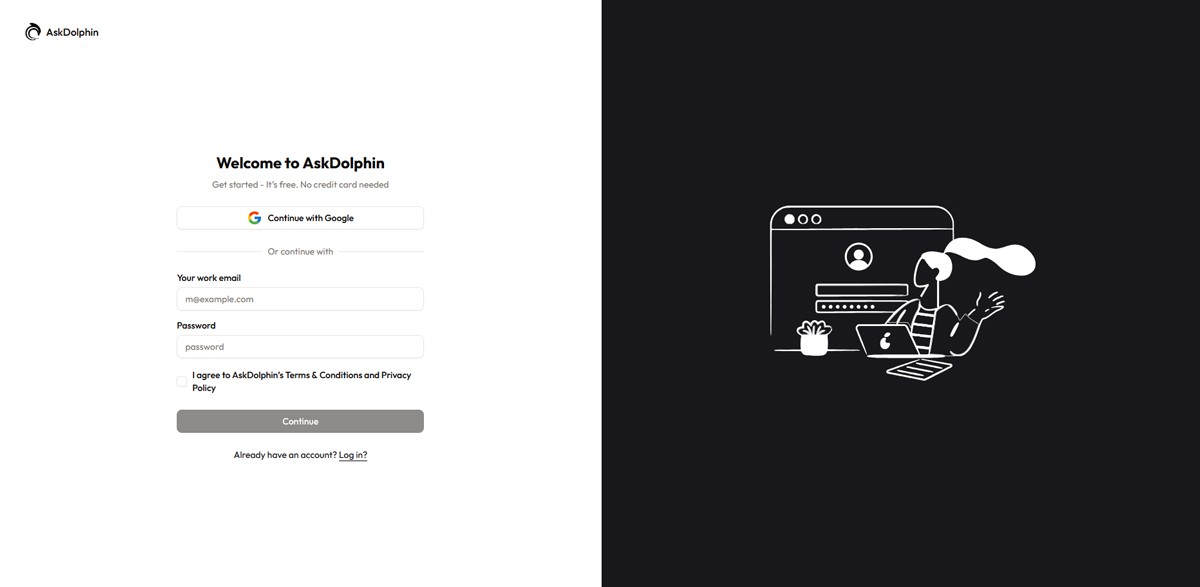
Step 2: Create your AskDolphin account
If you do not have an AskDolphin account yet, create one first.
After signing up, you can continue the Framer connection process and install your widget.
If you need help with signup, see the Creating and Setting Up Your Account article.
Step 3: Open the Framer installation page in AskDolphin
After creating your account, you may be redirected directly to the Framer installation page in your AskDolphin panel.
If not, open it manually from: Settings > Channels > Live Chat widget > Install chat widget > Connect to Framer
Step 4: Copy your Identify Code
On the Framer installation page, copy your unique 16-character Identify Code.
Step 5: Paste the code into the Framer plugin
Go back to your Framer project.
Paste the Identify Code into the AskDolphin plugin window.
Then click Install Widget.
After the connection is successful, the plugin status will change to Installed.
Step 6: Publish your site
Click the blue Publish button in Framer to make the widget live on your website.
After publishing, visit your site and refresh the page to make sure the AskDolphin chat widget is visible and ready to use.
Temporarily disable the AskDolphin widget
If you want to hide the AskDolphin chat widget for a short time without removing it from your Framer project, you can disable it from your AskDolphin panel.
Go to Settings > Channels > Live Chat widget
At the top of the page, find the Enable Live Chat widget toggle and switch it off.
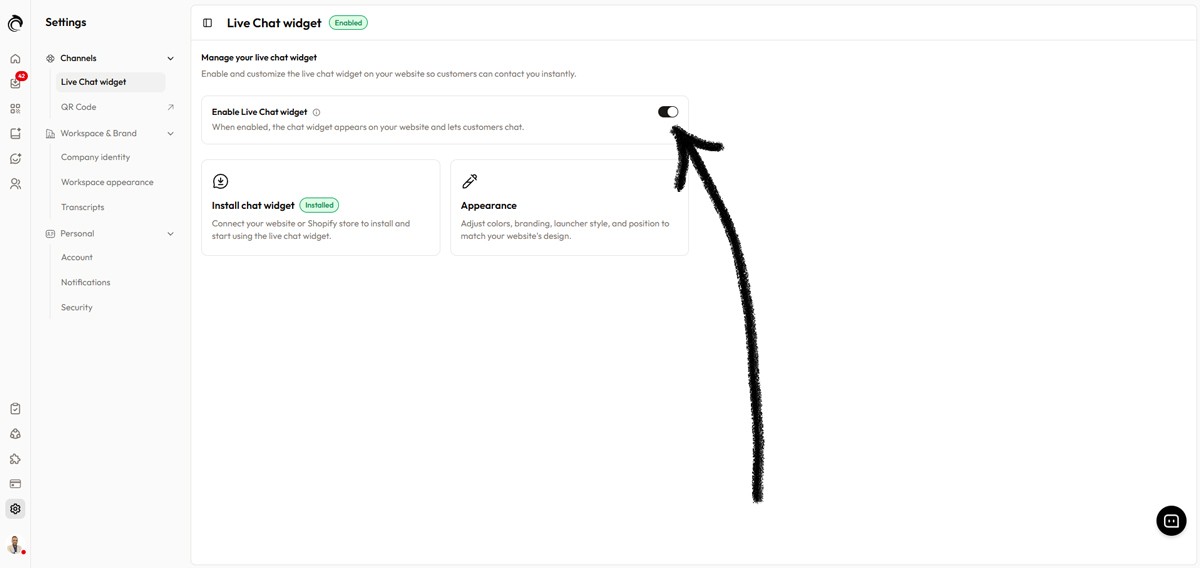
When this toggle is disabled, the chat widget will not appear on your website, but your Framer installation will remain connected.
This is the best option if you want to hide the widget temporarily and turn it on again later without reinstalling it.
Remove AskDolphin from Framer
If you want to fully remove the AskDolphin widget from your Framer project, you can do it directly from the AskDolphin plugin inside Framer.
Step 1: Open your Framer project
Log in to Framer and open the project where AskDolphin is installed.
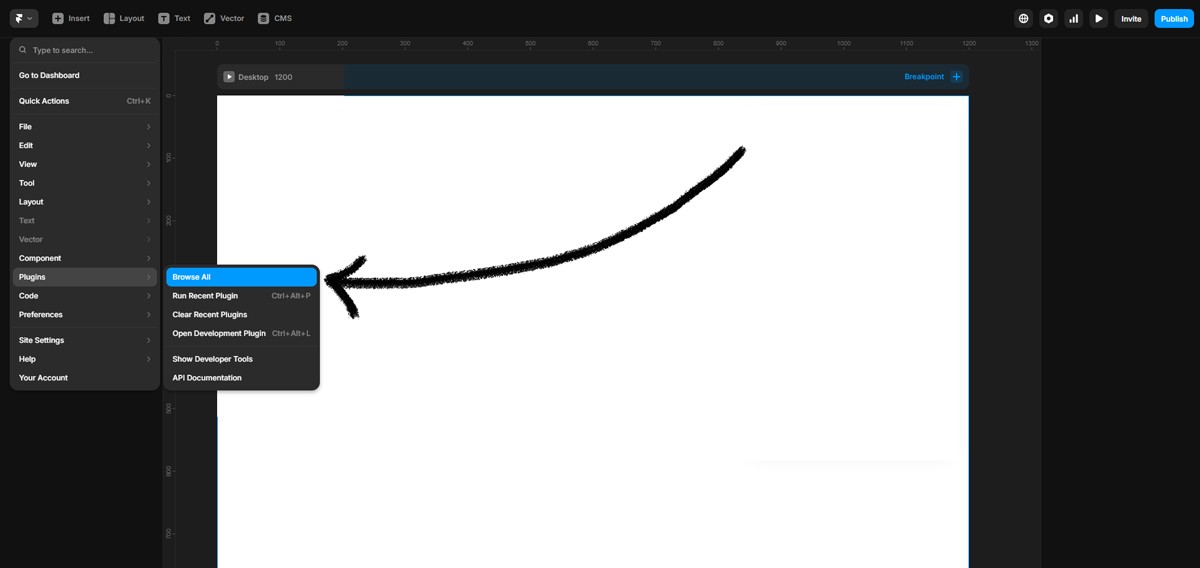
Step 2: Open the Plugins menu
In the top-left corner of Framer, click the Framer menu icon.
Then open Plugins > Browse All
Step 3: Open the AskDolphin plugin again
In the Plugins window, search for AskDolphin in the search field.
You can also open it from your recent plugins list if it appears there.
After a few moments, the AskDolphin plugin window will open again inside your project.
Step 4: Remove the widget
In the AskDolphin plugin window, click Remove Widget.
This will remove the AskDolphin widget and its installation from your Framer project.
Step 5: Publish your changes
After removing the widget, click the blue Publish button again in Framer.
This updates your live website and removes the AskDolphin widget from the published version of your site.
Step 6: Verify the removal
Open your website and refresh the page to make sure the AskDolphin chat widget is no longer visible.
Need help?
If you run into any issues during installation, make sure that:
You copied the correct 16-character Identify Code from your AskDolphin panel
You pasted the code into the AskDolphin plugin inside the correct Framer project
You clicked Install Widget
You clicked Publish in Framer after installation
If the widget still does not appear, go back to your AskDolphin Framer installation page and check the installation status again.
If you want, next I can also turn this into the exact Help Center CMS format with your internal link-anchor text ready to paste.
Any other questions? Get in touch