Get Started
Start Using the AskDolphin Panel
In this article, you’ll learn:
How to navigate the AskDolphin user interface
What visitor information is available
How to add operators to your team
How to update your profile with a new avatar
How to set your status to offline
Let’s get started and make your setup process as simple as possible!
Navigating the AskDolphin Panel Interface
From Your Visitor's Perspective
The chat widget is always accessible for your website visitors, appearing as an icon in the corner of their screen. When clicked, they can instantly start a conversation with Dolphin AI or your team:
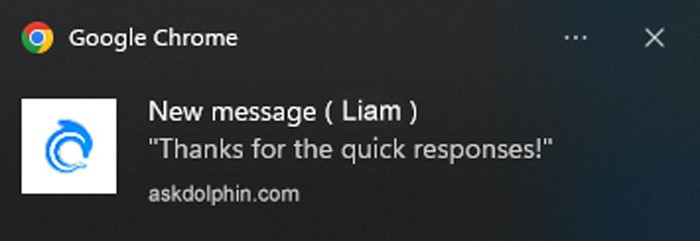
Message Notifications
Once a visitor sends a message by hitting "Enter," you’ll receive a pop-up notification in your browser along with a sound alert to ensure you never miss a query:
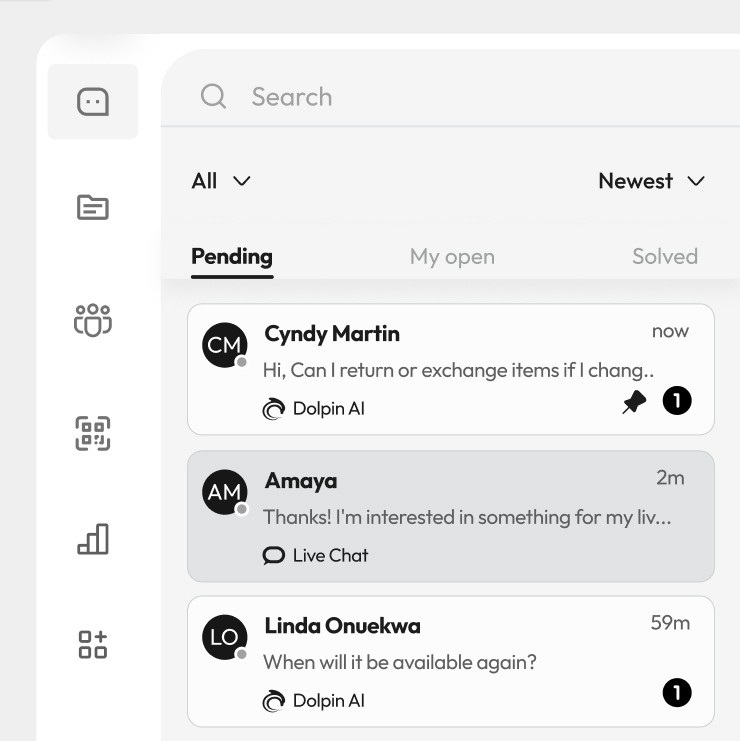
Tracking Visitors in the Panel
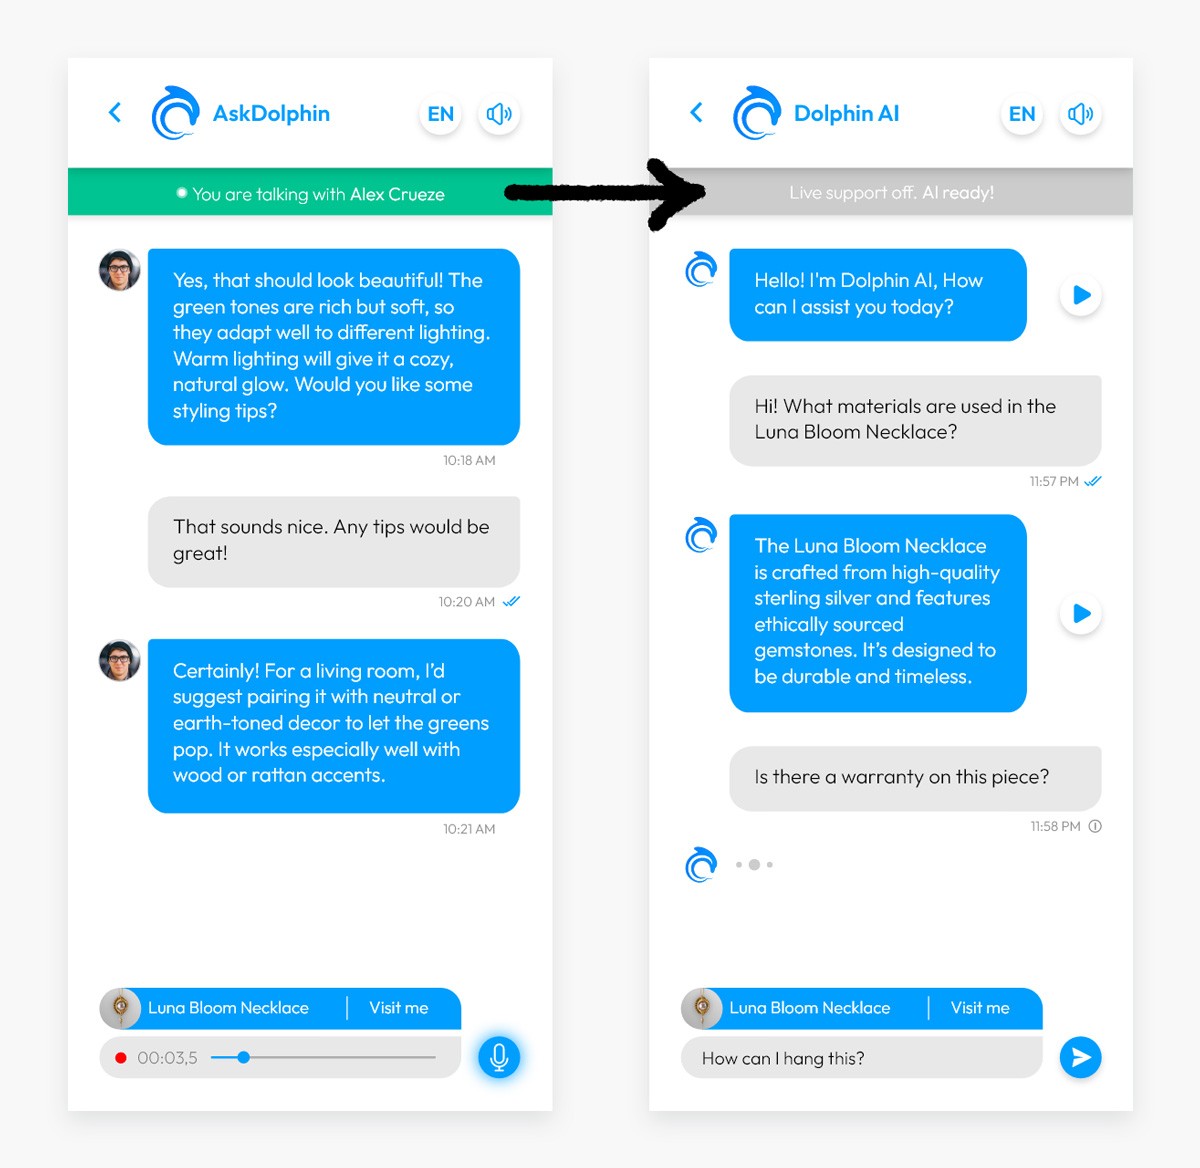
New visitor chats will appear in the Pending section of the Inbox in your AskDolphin Panel. If Dolphin AI is activated, it will respond to the visitor’s initial messages, and if the visitor requests an agent, the chat will move to Pending for your team to handle. If Dolphin AI is off, all visitor messages will directly appear in the Pending section. From there, you can assign conversations to yourself or other team members to ensure quick and efficient support:
Understanding Your Visitors
When engaging with visitors, you’ll find their key details conveniently displayed in the upper-right corner of the conversation window.
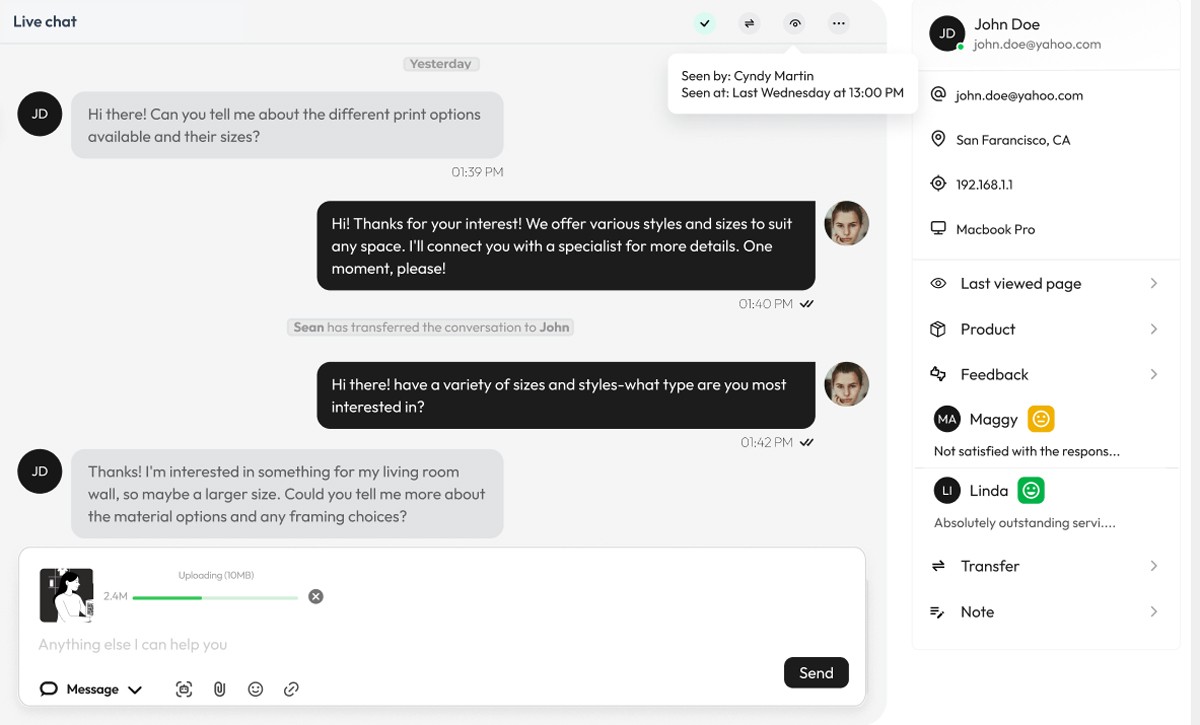
This section provides essential information such as the visitor’s name, email, or unique ID, along with their location map, viewed pages, browser version, operating system, and IP address. These insights help you personalize interactions and better understand your visitor's needs during the conversation.
Manage Team Members
As the Owner, you hold the highest access level within your AskDolphin account. Adding team members as operators ensures smooth collaboration and better support management.
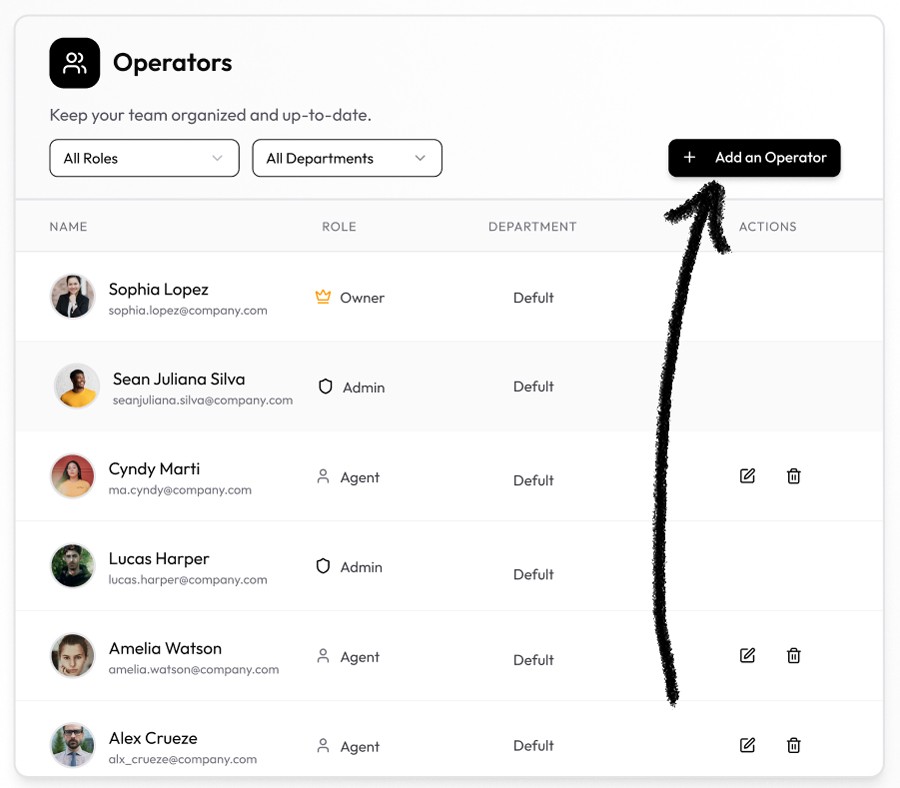
Steps to Add a New Operator
Navigate to Panel > Team > Operators in the AskDolphin dashboard,
Click on the blue Add an Operator button:
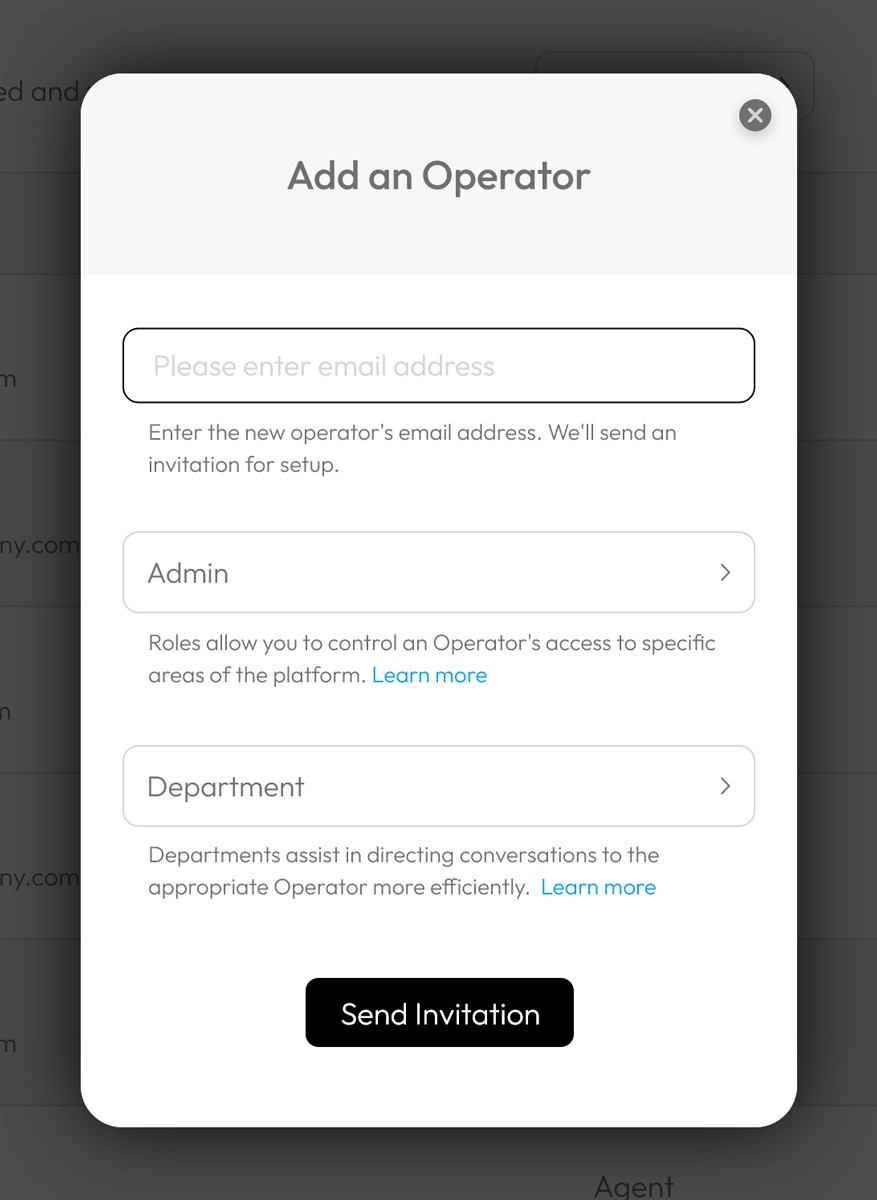
Fill in the operator's details in the pop-up window. Enter their email address, assign a role (Admin, Agent, etc.), and select a department if applicable. Once the details are complete, click the Send Invitation button:
A confirmation email will be sent to the operator’s email address. They can then log in at www.askdolphin.com to set up their password and personal information:
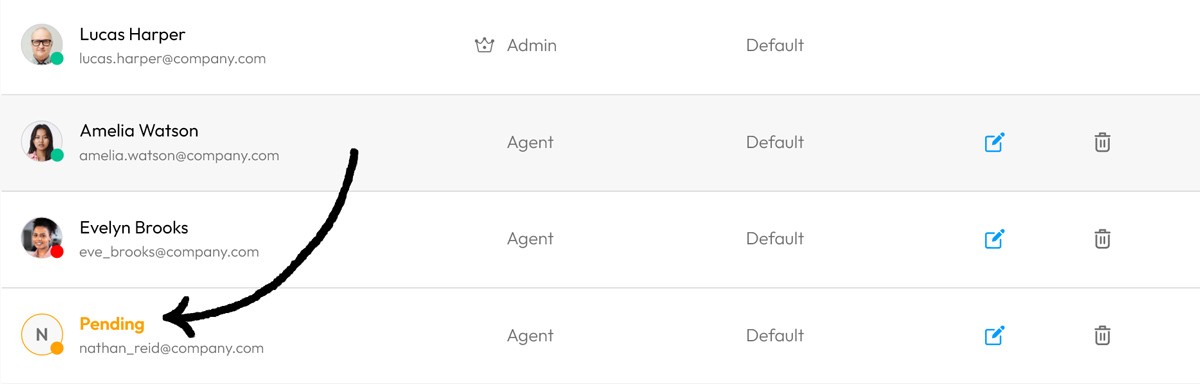
Once completed, the new operator can access the AskDolphin Panel and join your team to deliver seamless support.
Customize Your Operator Profile
To update your profile with a new avatar, navigate to the Settings > Personal > Account section:
In this section, you can upload a new avatar for your operator profile. Additionally, you can update other personal details such as your name, phone number, and address for better communication and identification:
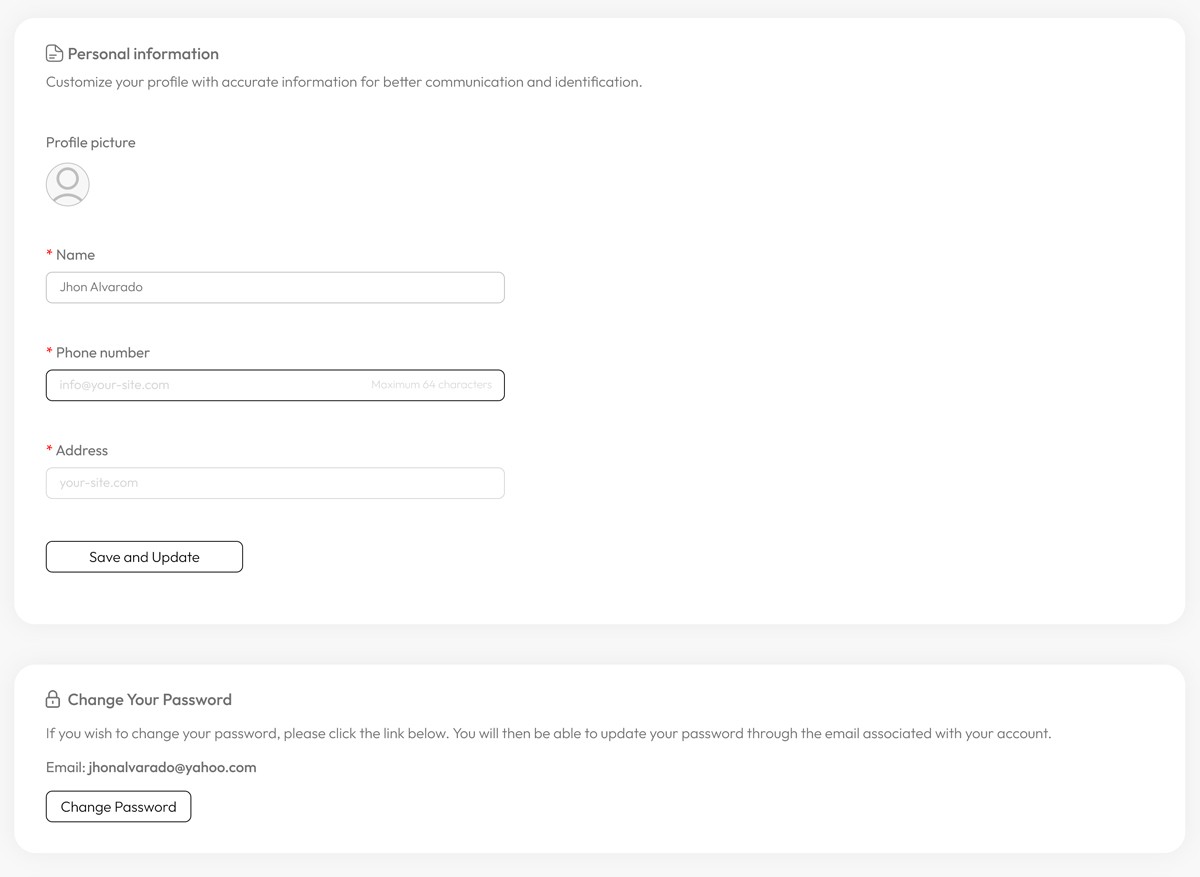
Once you’ve made your changes, click Save and Update to finalize the process.
Set Your Status to Offline
When you finish your tasks or need a break, you can set your status to Offline. This change updates your chat widget to inform visitors of your unavailability and lets them know when they might expect a response. Visitors can still send messages, including their contact details, which will be forwarded to your email for follow-up.
To set your status to offline or log out of the panel:
Click your avatar in the bottom-left corner of your panel (or the placeholder image if you haven’t uploaded one).
Toggle the status from Online to Offline to switch your account to offline mode.
Both users and agents receive email notifications when offline, ensuring no messages are missed. Notifications are sent to the email address linked to your AskDolphin account. Additionally, agents are notified via email when they assign a conversation to themselves.
Any other questions? Get in touch